Add A Printer - Print Server Method
Print
Created by: Michael Stepniewski
Modified on: Thu, 30 Apr, 2020 at 10:31 AM
Purpose of Document: Demonstrate how to configure a printer at FLASH using the print server
Prerequisites: AD User
Steps:
- Look at the printer you want to print to and locate the printer share. This should be on a white label affixed to the front of the printer and begin with \\FLASHDC\<printername>
| 
|
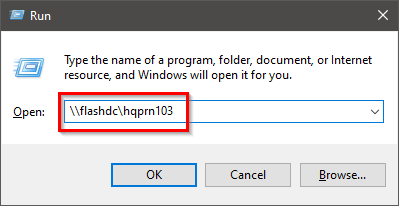
- Press the (Windows Key + R)
- (⊞ + R)
- Enter the share name including the backslashes into the text field. In this example it would be “\\flashdc\hqprn103”
| 
|
- You will see the driver attempt automatic installation
| 
|
- When this completes you will be able to select your printer from your app such as word.
| Verify that the printer you have selected says “<printer name> on FLASHDC” |
- If you are having issues with this method a manual install may be necessary. Contact IT support by sending an email to support@flashtrucking.com indicating that you had tried this method and it produced an error.
| |
| |
| |
| |
Michael is the author of this solution article.
Did you find it helpful?
Yes
No
Send feedback Sorry we couldn't be helpful. Help us improve this article with your feedback.