How to Start and Test Data Sync Client
Print
Created by: Michael Stepniewski
Modified on: Thu, 14 May, 2020 at 8:31 AM
Purpose of Document: Demonstrate enabling Data-Sync and Perform a Test Sync
Prerequisites: Interact and Data-Sync must already be installed on the PC
Steps:
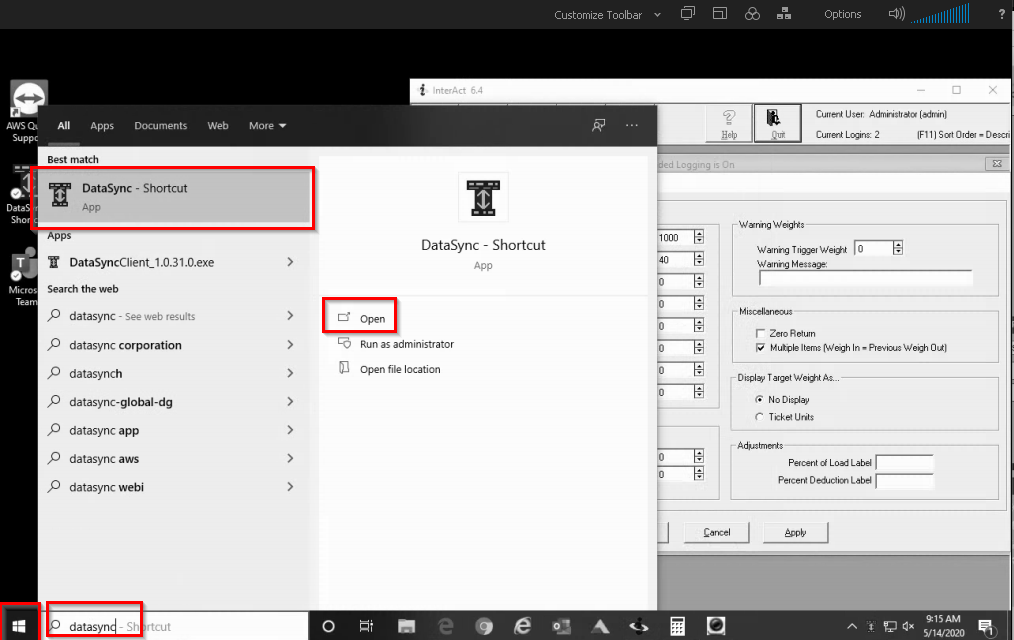
- Click “start” or press the “windows key”
- Type DataSync all one word with no spaces
- Click “Open”
| 
|
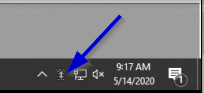
- You will see the DataSync icon in the quick launch. However, if you have many items in your quick launch it may go into the “caret” which is the quick launch overflow.
| 
|
- Click the Overflow button “^” and then you will find the DataSync icon there.
| 
|
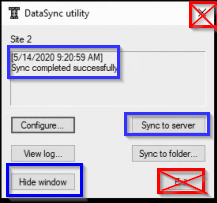
- Right-click on the DataSync icon and the DataSync window will open
- In this example you will see that a sync completed successfully. This means that DataSync is working properly and can be closed by clicking on “hide window”. DO NOT use the X or the “Exit” buttons. Use the "Hide Window" button.
- To test data sync press the “Sync to server” button. After this you should see a confirmation in the top section saying that the sync completed successfully.
- If you have any questions or issues with this process please send an email to support@flashtrucking.com
| 
|
Michael is the author of this solution article.
Did you find it helpful?
Yes
No
Send feedback Sorry we couldn't be helpful. Help us improve this article with your feedback.